Welcome to Part III of our blog series on extracting entities from text reviews using NLP Lab. In this installment, we delve into the training process for building an NLP model that automates entity extraction from hotel reviews.
In the previous blog post, we discussed how to manually annotate customer reviews based on specific annotation guidelines. We also explored the concept of pre-annotating tasks to simplify the annotation process and learned how to establish relationships between different entities. Additionally, we explored the process of exporting annotated data from NLP Lab.
Our objective is to develop an NLP model capable of automating the extraction of entities from hotel reviews. In this blog post, we focus on the training process required to train the model using the annotated data from the previous blog post. All the tasks we annotated earlier will be utilized during the model training. Once the model is trained, we will validate the metrics to ensure that the model accurately labels the majority, if not all, of the entities. To assess the model’s performance, we will also test it on a separate playground and analyze the results.
By the end of this blog post, you will gain a comprehensive understanding of the annotation features, pre-annotation features, model training, and testing features offered by NLP Lab. Equipped with this knowledge, you will be able to enhance your data labeling workflow and harness the power of deploying precise models.
Model Training
Once we submit all the tasks, they will be marked blue on the tasks page.
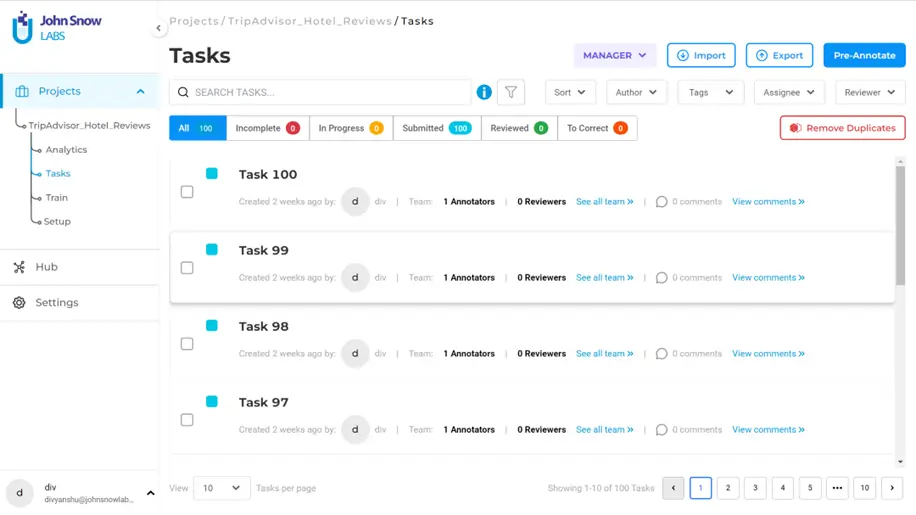
Note that for model training it is not necessary to have all the annotations reviewed. When you train the model, you can select if you want to filter the tasks by submissions or reviewed.
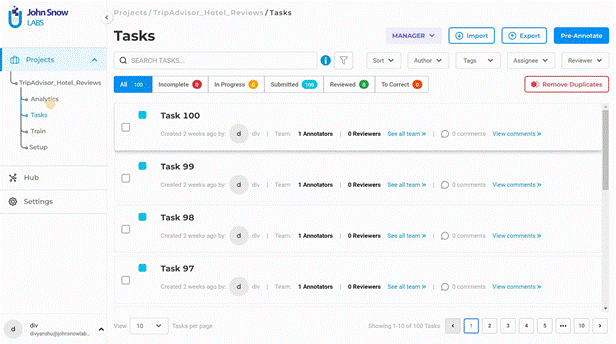
To proceed to training, navigate to “Train” option from the side menu under “Projects”. The gif below captures how you can train a model with just a few clicks.
Before proceeding, let us look at the training settings and parameters:
- Training Type: These are the general settings where you can specify what kind of task you are training the model for. In this case we choose NER, since we are dealing with entities.
- License Type: Select depending on the license you have. Since we are not dealing with any health records, or financial data, or data involving legal matters, we choose “Open source” option.
- Embeddings: Select the embeddings depending on the kind of data you have.
- Epoch: In model training, epoch refers to a complete pass through the entire dataset during the optimization process. You can assign a value to this depending on the amount of annotated data.
- Learning rate: a hyperparameter that determines the step size at which the model’s parameters, such as weights and biases, are updated during optimization. Since we have only 100 tasks in this project, we will not change its default
- Learning rate decay: refers to the gradual reduction of the learning rate during model training to facilitate convergence and improve performance. We do not change its default value for the same reason stated above.
- Dropout: a technique used during model training that randomly deactivates a fraction of the neurons in a neural network, reducing overfitting.
- Batch: refers to a subset of training examples that is processed together during model training.
It might take some time to train the model. To keep track of the model training, you can see the training which look as shown below.

Once the model is successfully trained, you will be notified, and you can find the model in Hub >> Models. If you have a lot of models in the hub, you can simplify your search. To simplify the search, use filter “Trained in NLP Lab” (and maybe put a filter on language to simplify further), navigate to the last page, and the last card on the page should be the latest trained model.

To know how accurate the training has been, you can look at the benchmark which provides calculated metrics such as the f1 score, false negatives, false positives, true positives, precision and recall. Simply click on the icon highlighted with a red line in the above image to get the summary of the metrics.

When you are satisfied with the numbers shown in the benchmark, you can try the model out in a test playground. Click on the three dots on the card and select “Playground”. Clicking it deploys the playground server. You can replace the default text in the input with a test sample. Note that you may have to wait a little for the playground server to set up.

Click on “Test” to run the model. Below are the test results for the model that we have trained on an unseen hotel review sample.

Here we can see that our model has performed well on the test sample, since it correctly extracted the relevant entities.
Therefore, our aim to train an NER model from scratch is complete. Upon successful training, you will be notified on the training page, and the model will be available in “Hub >> Models”. Next time when you are dealing with similar data, you can make use of the pre-annotation feature using this model to pre-annotate all your new tasks and obtain best predictions on them.
To conclude, we are now at the end of our blog series on the end-to-end NER project. To summarize, we learned how to create a project from scratch, set up the configuration, import tasks to the project, data annotation, pre-annotation, exporting the annotated tasks, model training and testing. It doesn’t get any easier than this. No coding involved was a major positive point, enabling data annotation beyond data scientists and engineers.
Getting Started is Easy
The NLP Lab is a free text annotation tool that can be deployed in a couple of clicks on the AWS and Azure Marketplaces, or installed on-premise with a one-line Kubernetes script. Get started here: https://nlp.johnsnowlabs.com/docs/en/alab/install
